


In this tutorial, we will learn the necessary AR tools and techniques in Swift that will allow us to create an application that decorates your floor with some wood textured tiles. The final application will look like this:
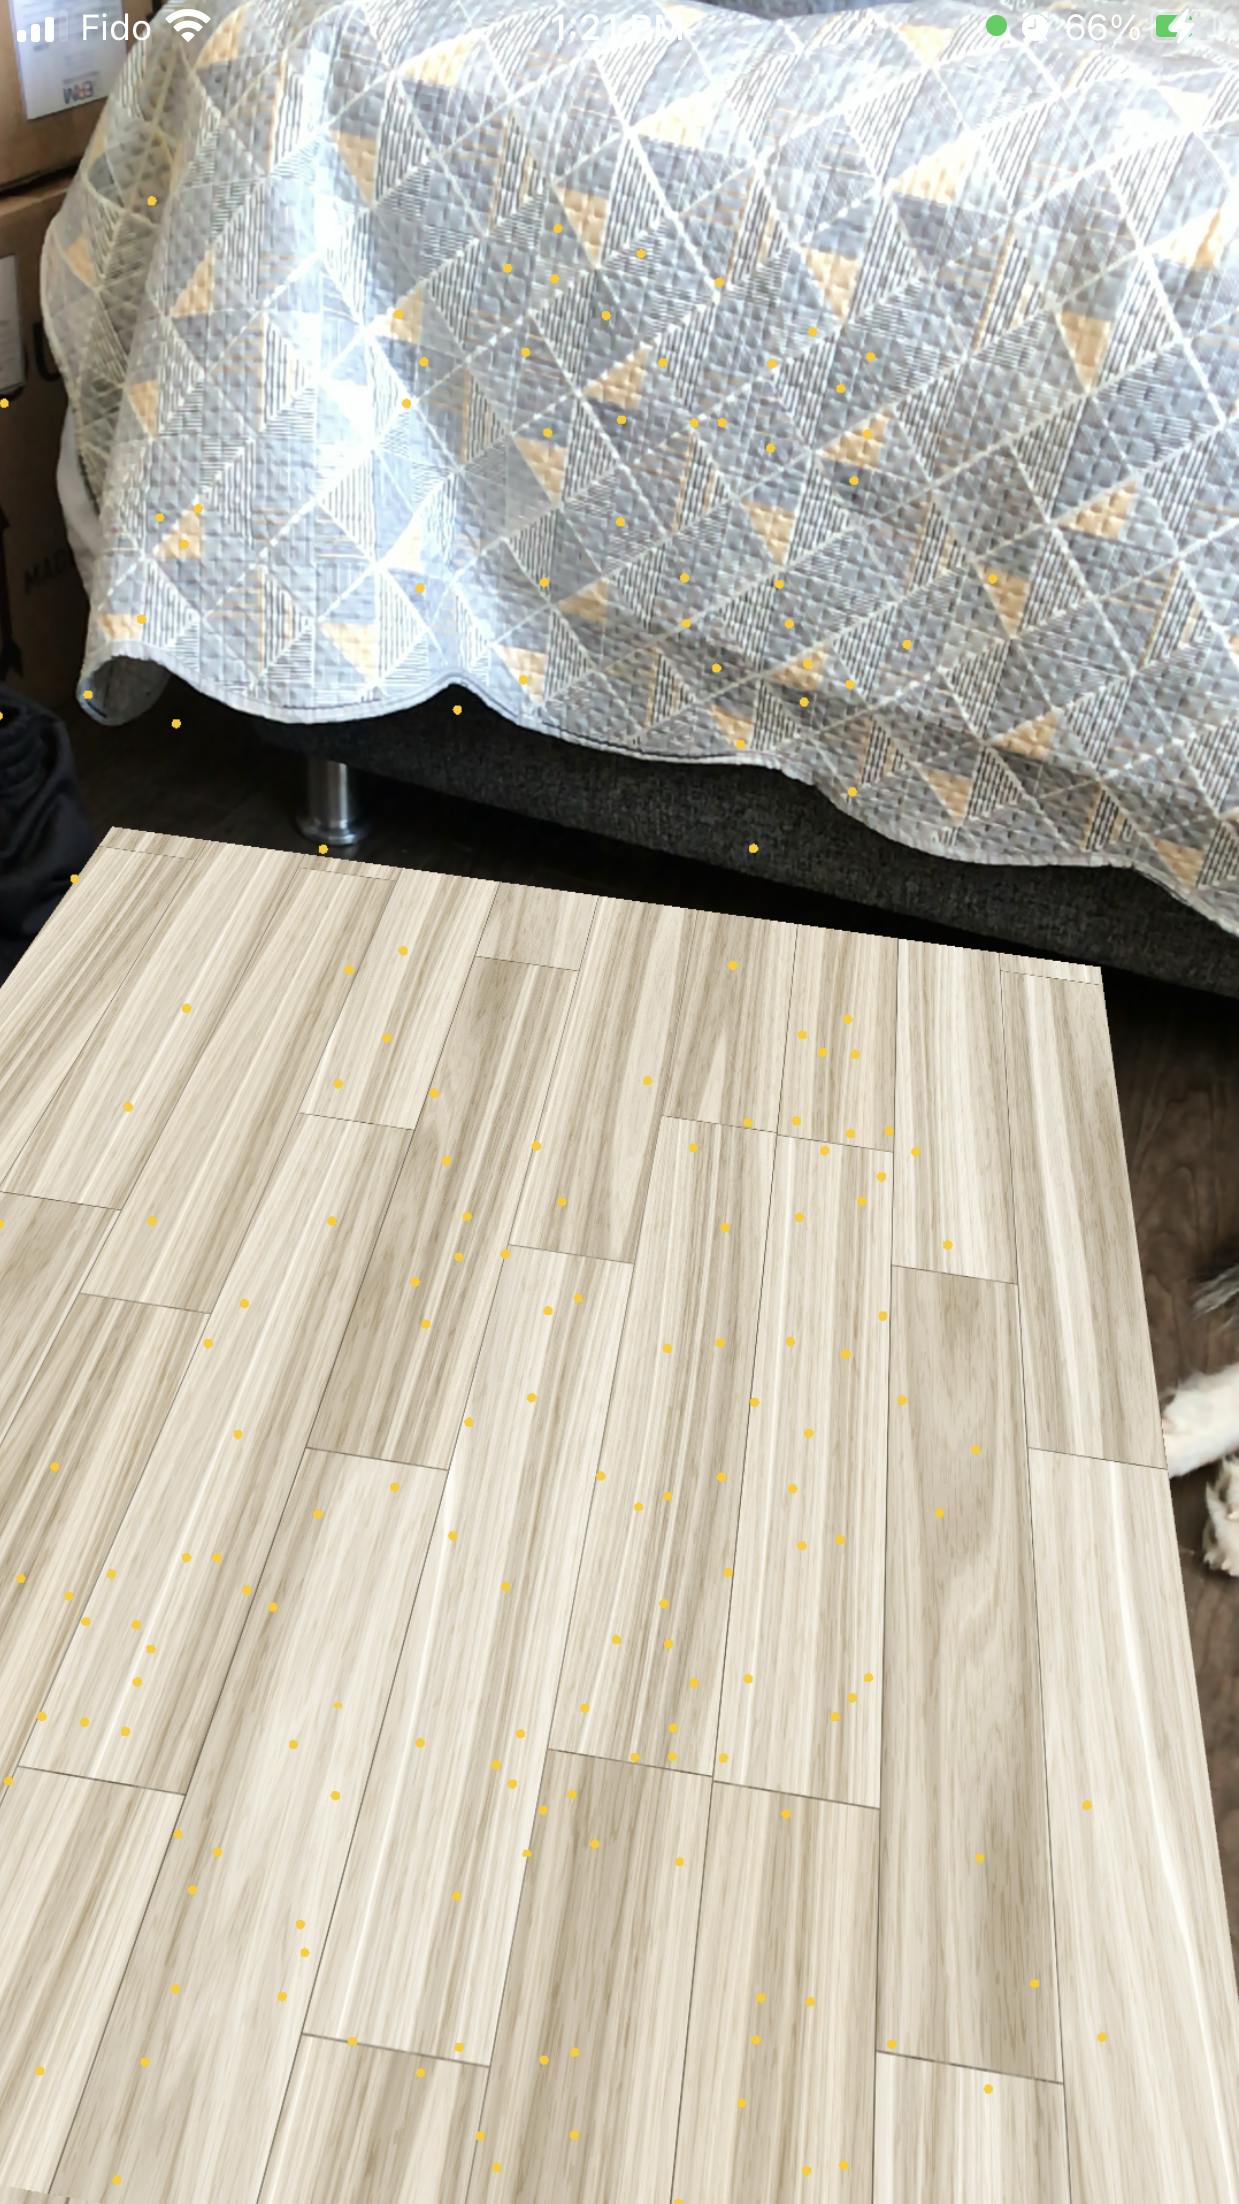
Let start.
Step 1- Creating an App with XCODE
open xcode, you will have a window like this:

Select Create New project

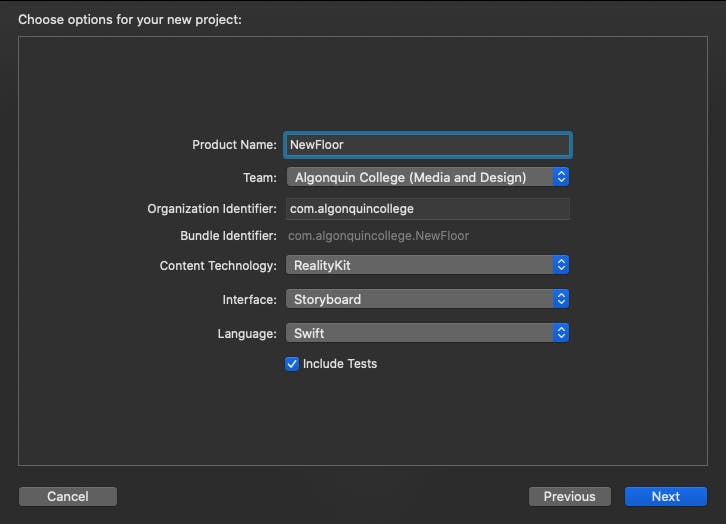
Add a name to your product, in this case, will be NewFloor:
Step 2- Adding Permissions
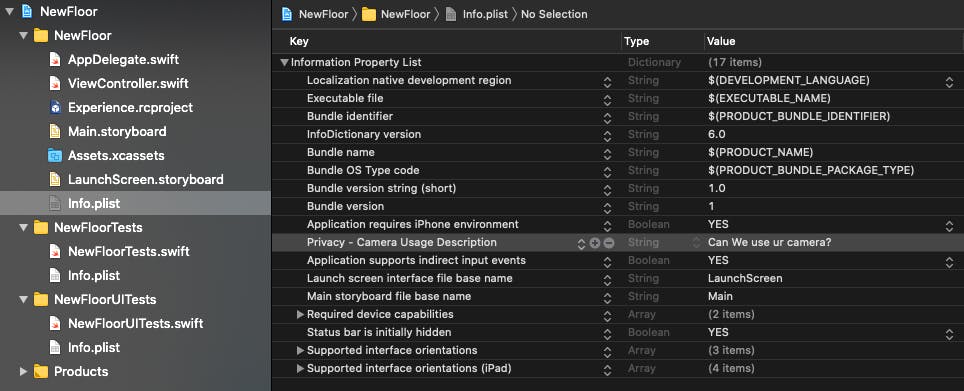
Now, the first thing we will do is go to the info.plist file and enable the use of the camera. Camera capability is the first thing you need for an AR application. Look for the key Camera Usage Description, like the image below, and give it an appropriate message. This message will appear on the first launch of the application while requesting camera permissions from the user.
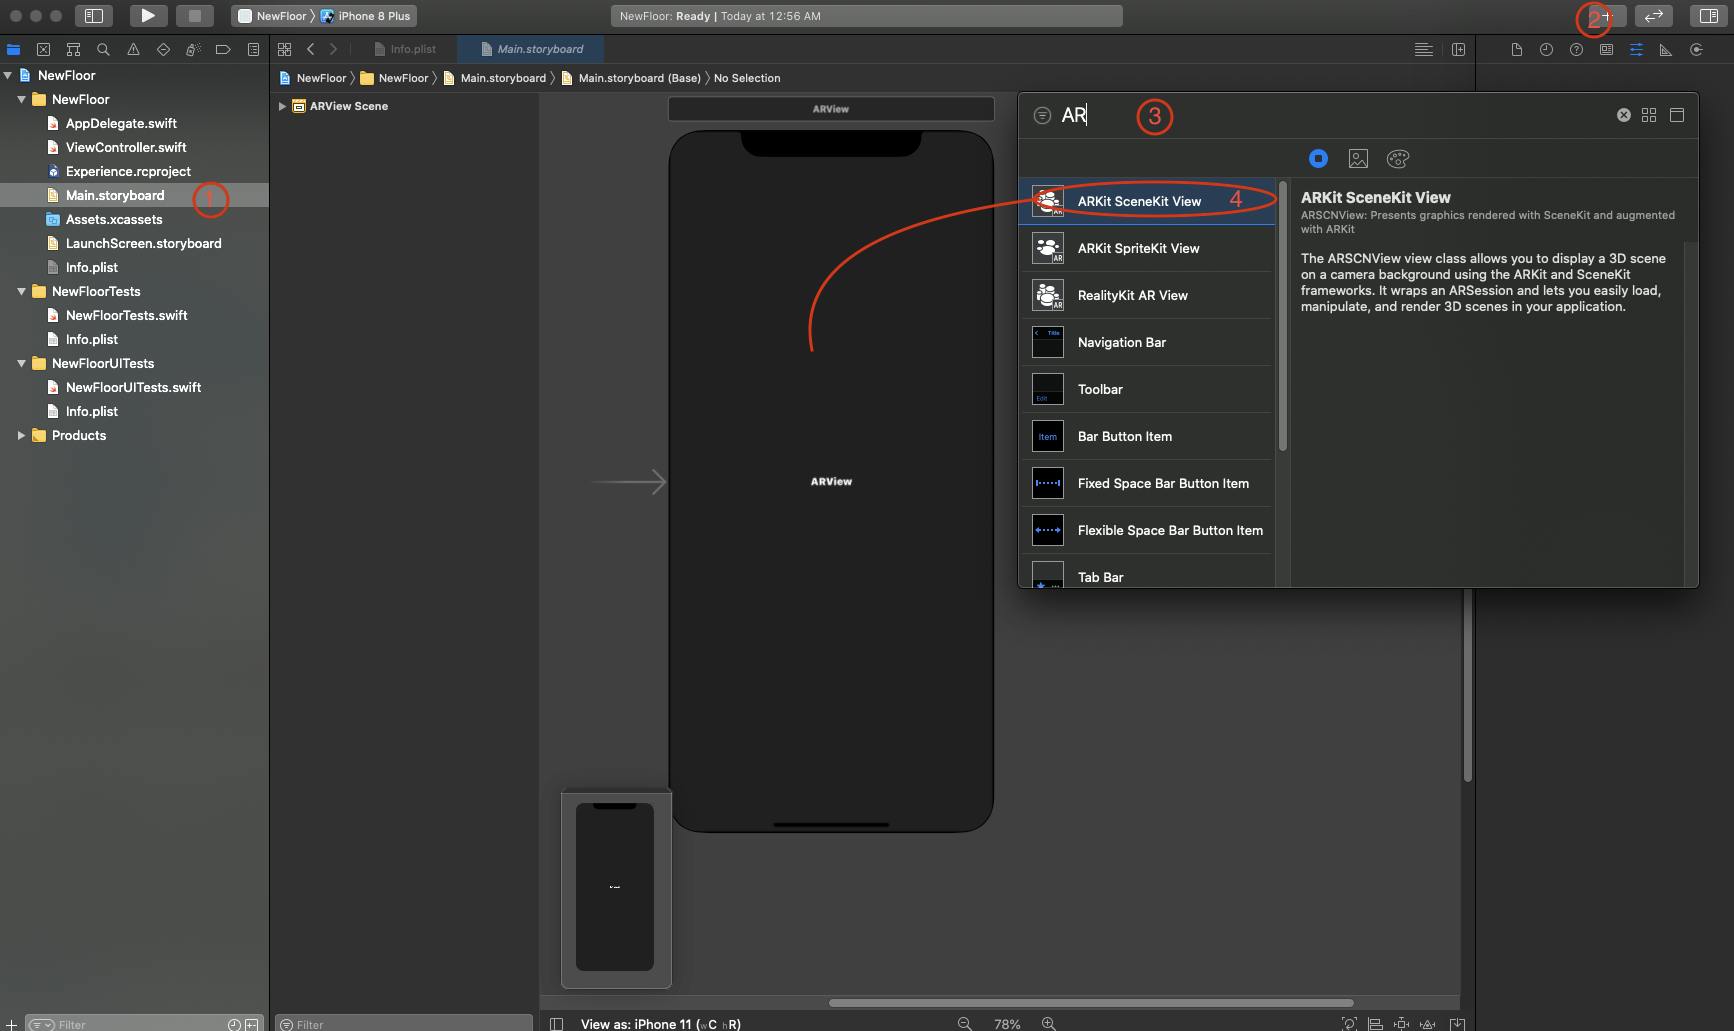
Step 3- Adding the ARKit 3.1 - Go to Main.storyboard. 3.2 - Click the Plus sign 3.3 - Search for the ARKit SceneKit 3.4 - Drag and drop an ARKit SceneKit view into the ViewController and attach the ARSCNView to the edges of the ViewController.
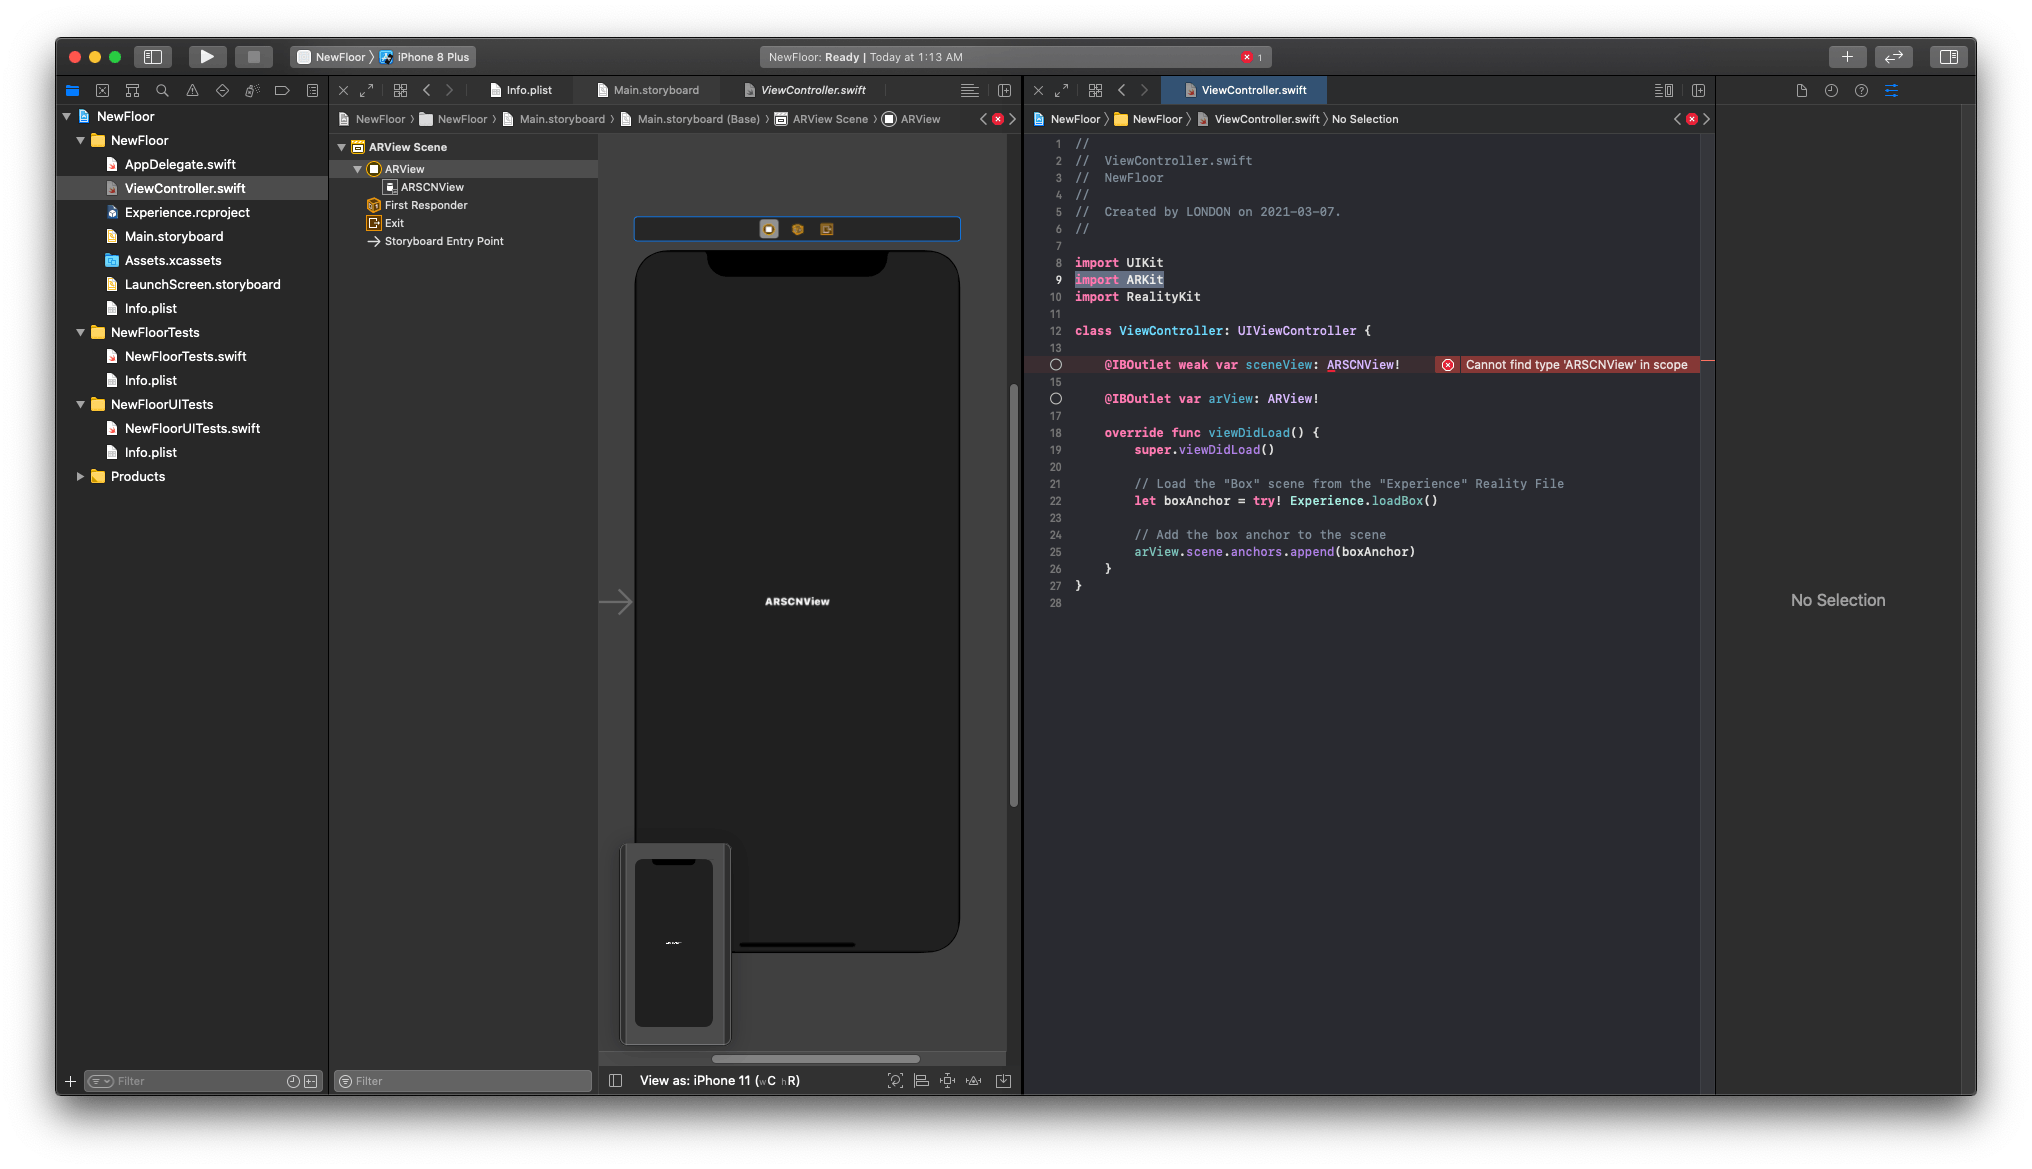
Step 4- Create an IBOutlet
Create an IBOutlet for the ViewController class and name it sceneView (Line number 14). As soon as you do this, you will get an error stating ARSCNView undeclared, as our view controller does not recognize anything of type ARSCNView. To solve this and use other ARKit functions, we need to import ARKit into the view controller (Line number 9). [Don't forget to link Line 14 with the Main.storyboard by clicking and dragging ]
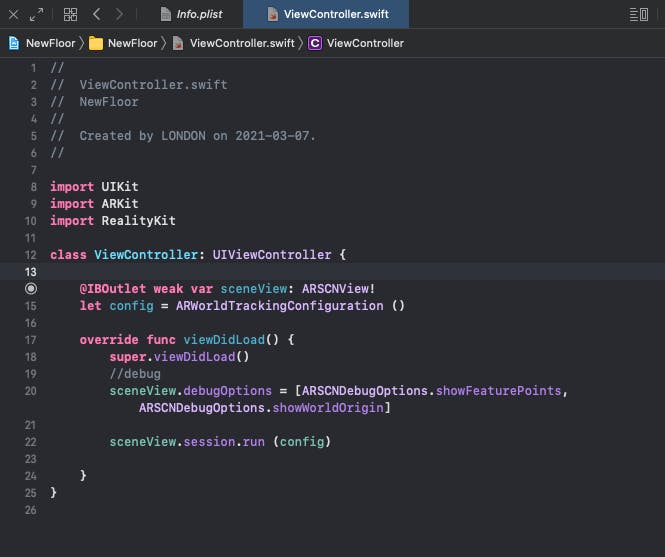
Step 5- Adding ARWorldTrackingConfiguration
Now in the view controller.swift file. Declare a property of type ARWorldTrackingConfiguration before the viewDidLoad() method and name it config. And our view controller will look like this :
Step 6- adding Debug
add this line, after the super.viewDidLoad() method.
sceneView.debugOptions = [ARSCNDebugOptions.showFeaturePoints, ARSCNDebugOptions.showWorldOrigin]
sceneView.session.run (config)
This will enable the debug and, show the coordinates.
Now run the application on your device (not on a simulator, as it does not have the camera). The alert requesting camera permission will pup- up with the message you typed, and please you must allow it.
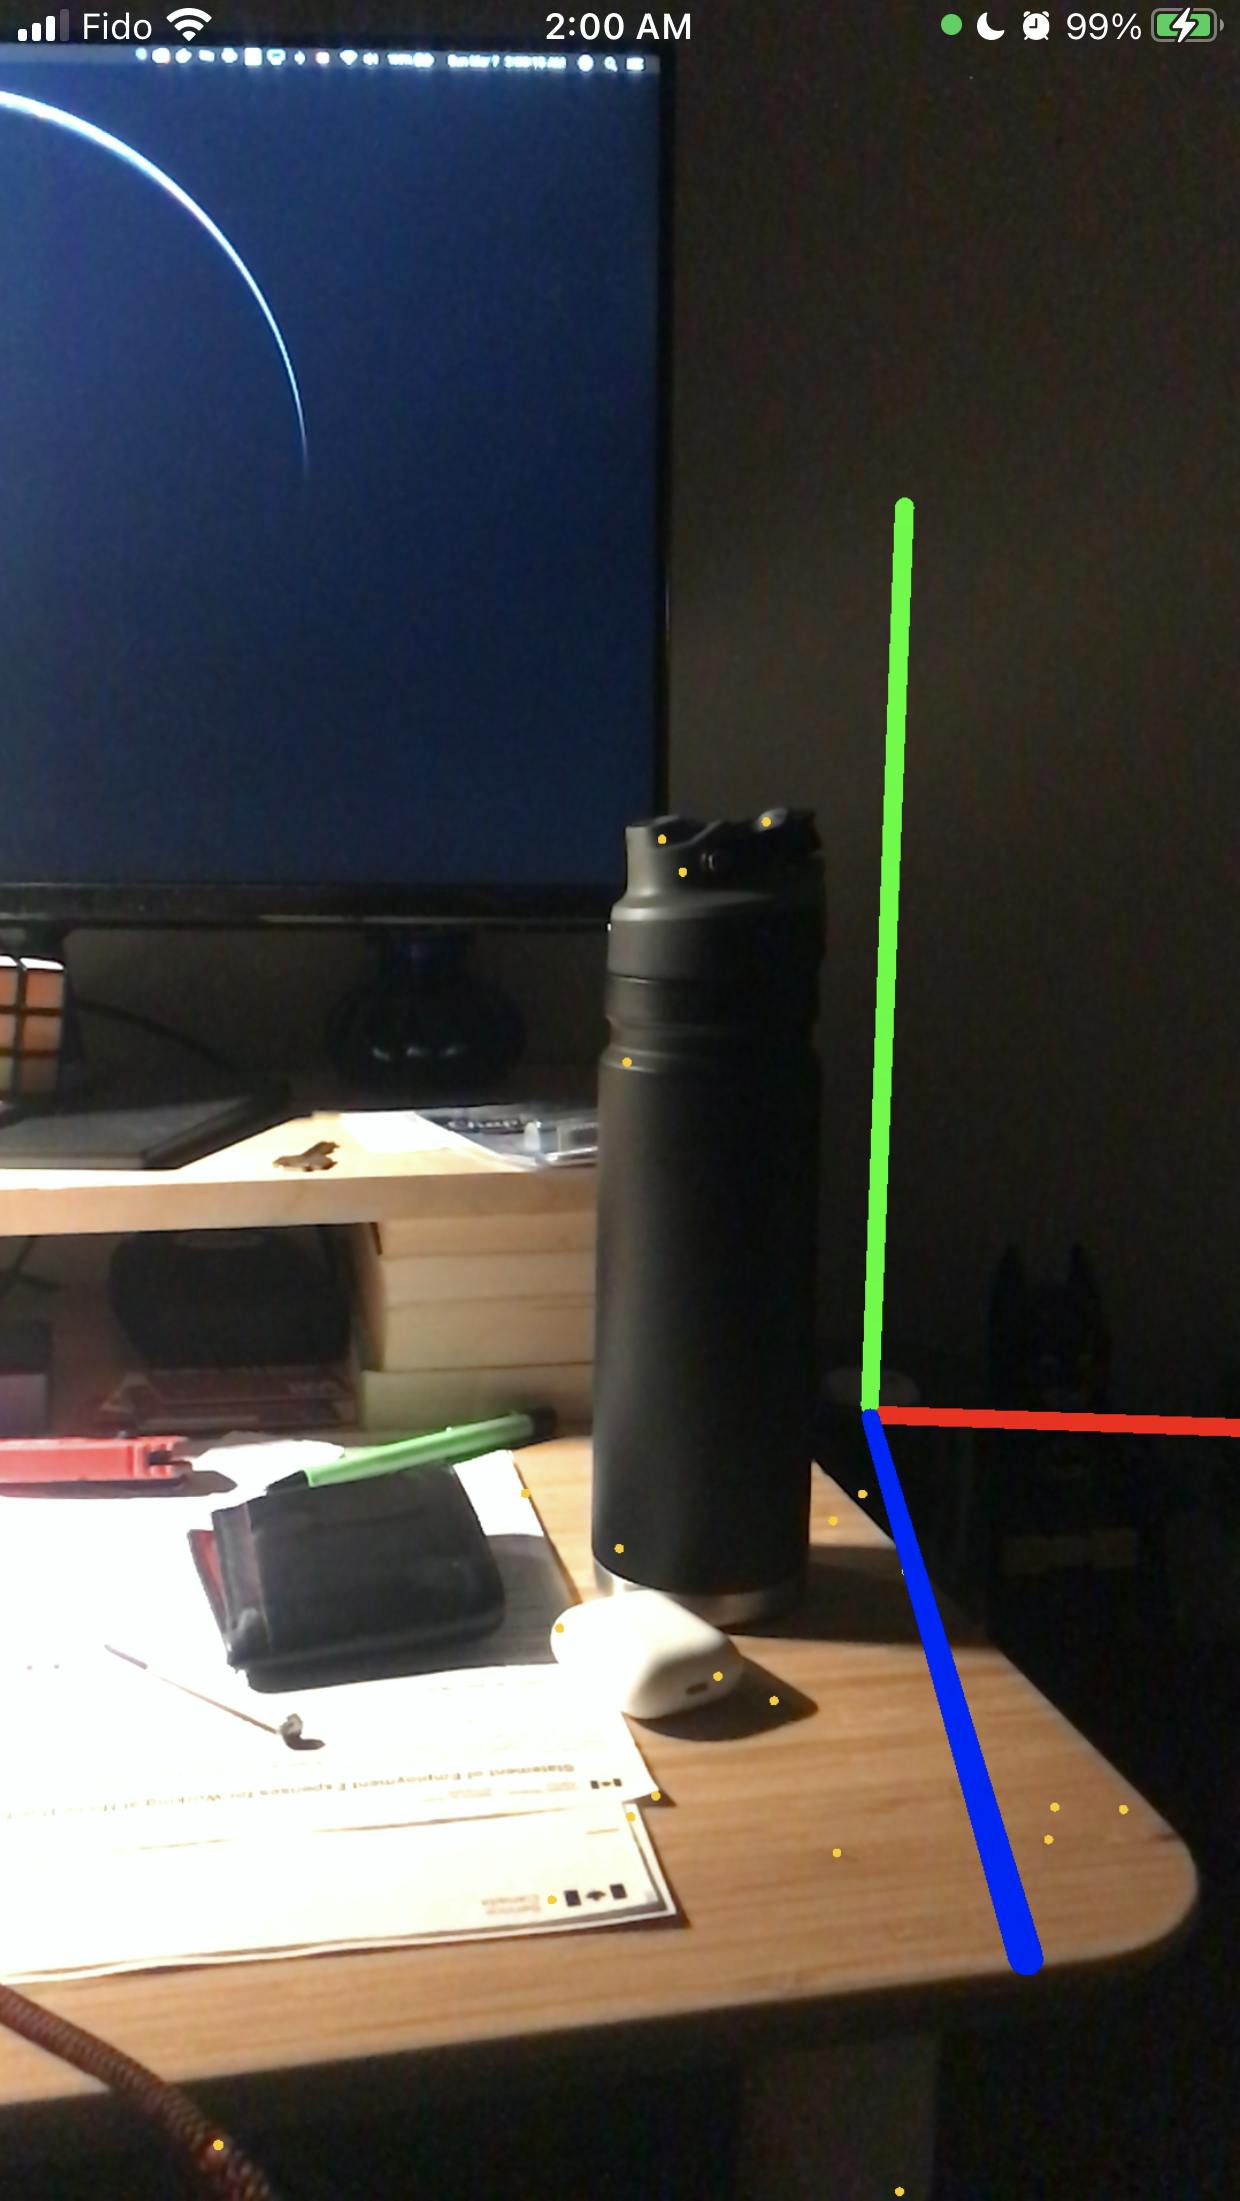
Eureka! is working!
Well now you can see the AR Axes, but How did AR axes work? The red bar or X-axis is used to place objects to the left or right of the world origin. The green bar or Y-axis is used to place objects at the top or bottom of the world origin. And the blue bar or Z-axis is used to determine how close or far an object will be placed from the world origin.
A positive value for X will place an object to the right of the world origin, and a negative will place it to the left. Positive for Y will place it at the top and negative will place it at the bottom of the world origin. Positive for Z will place it closer to, and negative will place it farther from the world origin.
ARSCENEView Delegates
Before starting the floor detection, we will explore some delegate methods of our sceneView to understand what capabilities we are equipped with to interact with an ongoing AR session.
didAdd - didUpdate and didRemove
didAdd At whatever point we move or tilt our gadget with an AR session on in it, the ARKit tries to discover distinctive ARAnchors within the environment. An ARAnchor contains data around a genuine world position and introduction that can be utilized to put an object. Once a diverse stay is found, a modern hub gets included in the scene with the same data to oblige this recently found grapple. This assign strategy will inform us around that. We'll be utilizing it to discover all the positions on the floor to put the tiles.
didUpdate Most of the time, all the nodes that get added from the anchors belong to the same object. Let’s say you are moving around the floor and the device finds a number of anchors at different positions. It tries to add all the nodes for those anchors, as it thinks that all these anchors belong to different objects.
But ARKit eventually recognizes that all of them belong to the same floor, so it updates the very first-floor node by appending dimensions of other duplicate nodes. This delegate method will inform us about that.
didRemove After updating the first unique node with dimensions of all other duplicate nodes, ARKit removes all the duplicate nodes and the delegate method notifies us.
Let start!
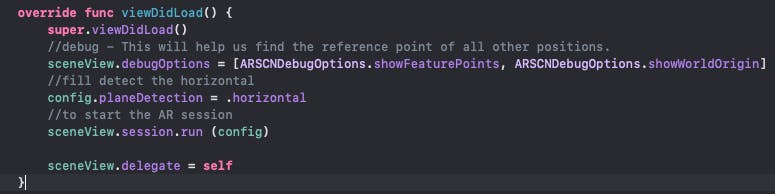
In the viewDidLoad method, remove everything after sceneView.session.run(config), we need to make our viewController a delegate of the scene view. Our ViewDidLoad() has to be like this:
Oh! oh! It's an error! It IS PERFECTLY OK!
Our view controller still is not conforming the sceneView delegate. To implement this, let’s create an extension of the view controller at the end of the ViewController.swift file.

ok, so let be back on the wheels
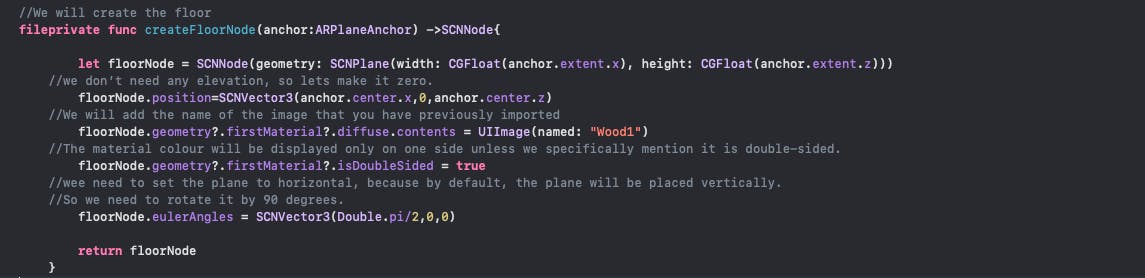
The didAdd SCNNode delegate method will get fired every time a part of the floor is discovered and a new node gets added to the scene based on the anchor. Within this method, we will create a floor node and will add it as a child of the recently added node in the position of the anchor.
at this point you may want to google some floor textures, just download the image and drag it into the Assets.xcassetes
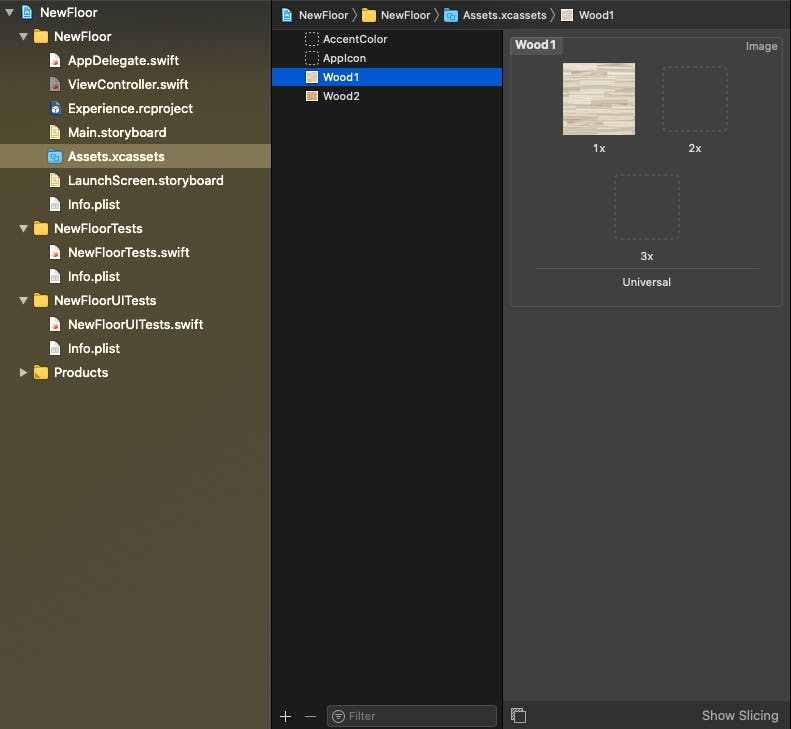
You can Named as you wish, for my case I will use Wood1 and Wood2
ok, so let start working on the floor. Add this code into your ViewController: UIViewController { } class, after the viewDidLoad() {}
We are so Close!, so now let's add the Methods.
Create the 3 Methods that we discussed before inside the extension ViewController:ARSCNViewDelegate{}:
//Add
func renderer(_ renderer: SCNSceneRenderer, didAdd node: SCNNode, for anchor: ARAnchor) {}
//Update
func renderer(_ renderer: SCNSceneRenderer, didUpdate node: SCNNode, for anchor: ARAnchor) {}
//Remove
func renderer(_ renderer: SCNSceneRenderer, didRemove node: SCNNode, for anchor: ARAnchor) {}
So let's play with this.
For the Add Node:
func renderer(_ renderer: SCNSceneRenderer, didAdd node: SCNNode, for anchor: ARAnchor) {
        //checking if the anchor is an ARPlaneAnchor, Remember! We only deal with this type of anchor.
        guard let planeAnchor = anchor as? ARPlaneAnchor else {return}
        //a new node is created based on the anchor
        let planeNode = createFloorNode(anchor: planeAnchor)
        //it’s added to the node.
        node.addChildNode(planeNode)
    }
For the Update Node:
    //update node
    func renderer(_ renderer: SCNSceneRenderer, didUpdate node: SCNNode, for anchor: ARAnchor) {
        //checking if the anchor is an ARPlaneAnchor, Remember! We only deal with this type of anchor.
        guard let planeAnchor = anchor as? ARPlaneAnchor else {return}
        node.enumerateChildNodes { (node, _) in
            node.removeFromParentNode()
        }
        //a new node is created based on the anchor
        let planeNode = createFloorNode(anchor: planeAnchor)
        //it’s added to the node.
        node.addChildNode(planeNode)
    }
For the Remove Node:
    //remove node
    func renderer(_ renderer: SCNSceneRenderer, didRemove node: SCNNode, for anchor: ARAnchor) {
        //checking if the anchor is an ARPlaneAnchor, Remember! We only deal with this type of anchor.
        guard let _ = anchor as? ARPlaneAnchor else {return}
        node.enumerateChildNodes { (node, _) in
            node.removeFromParentNode()
        }
    }
#Now execute this app and Enjoy your new Floor!
